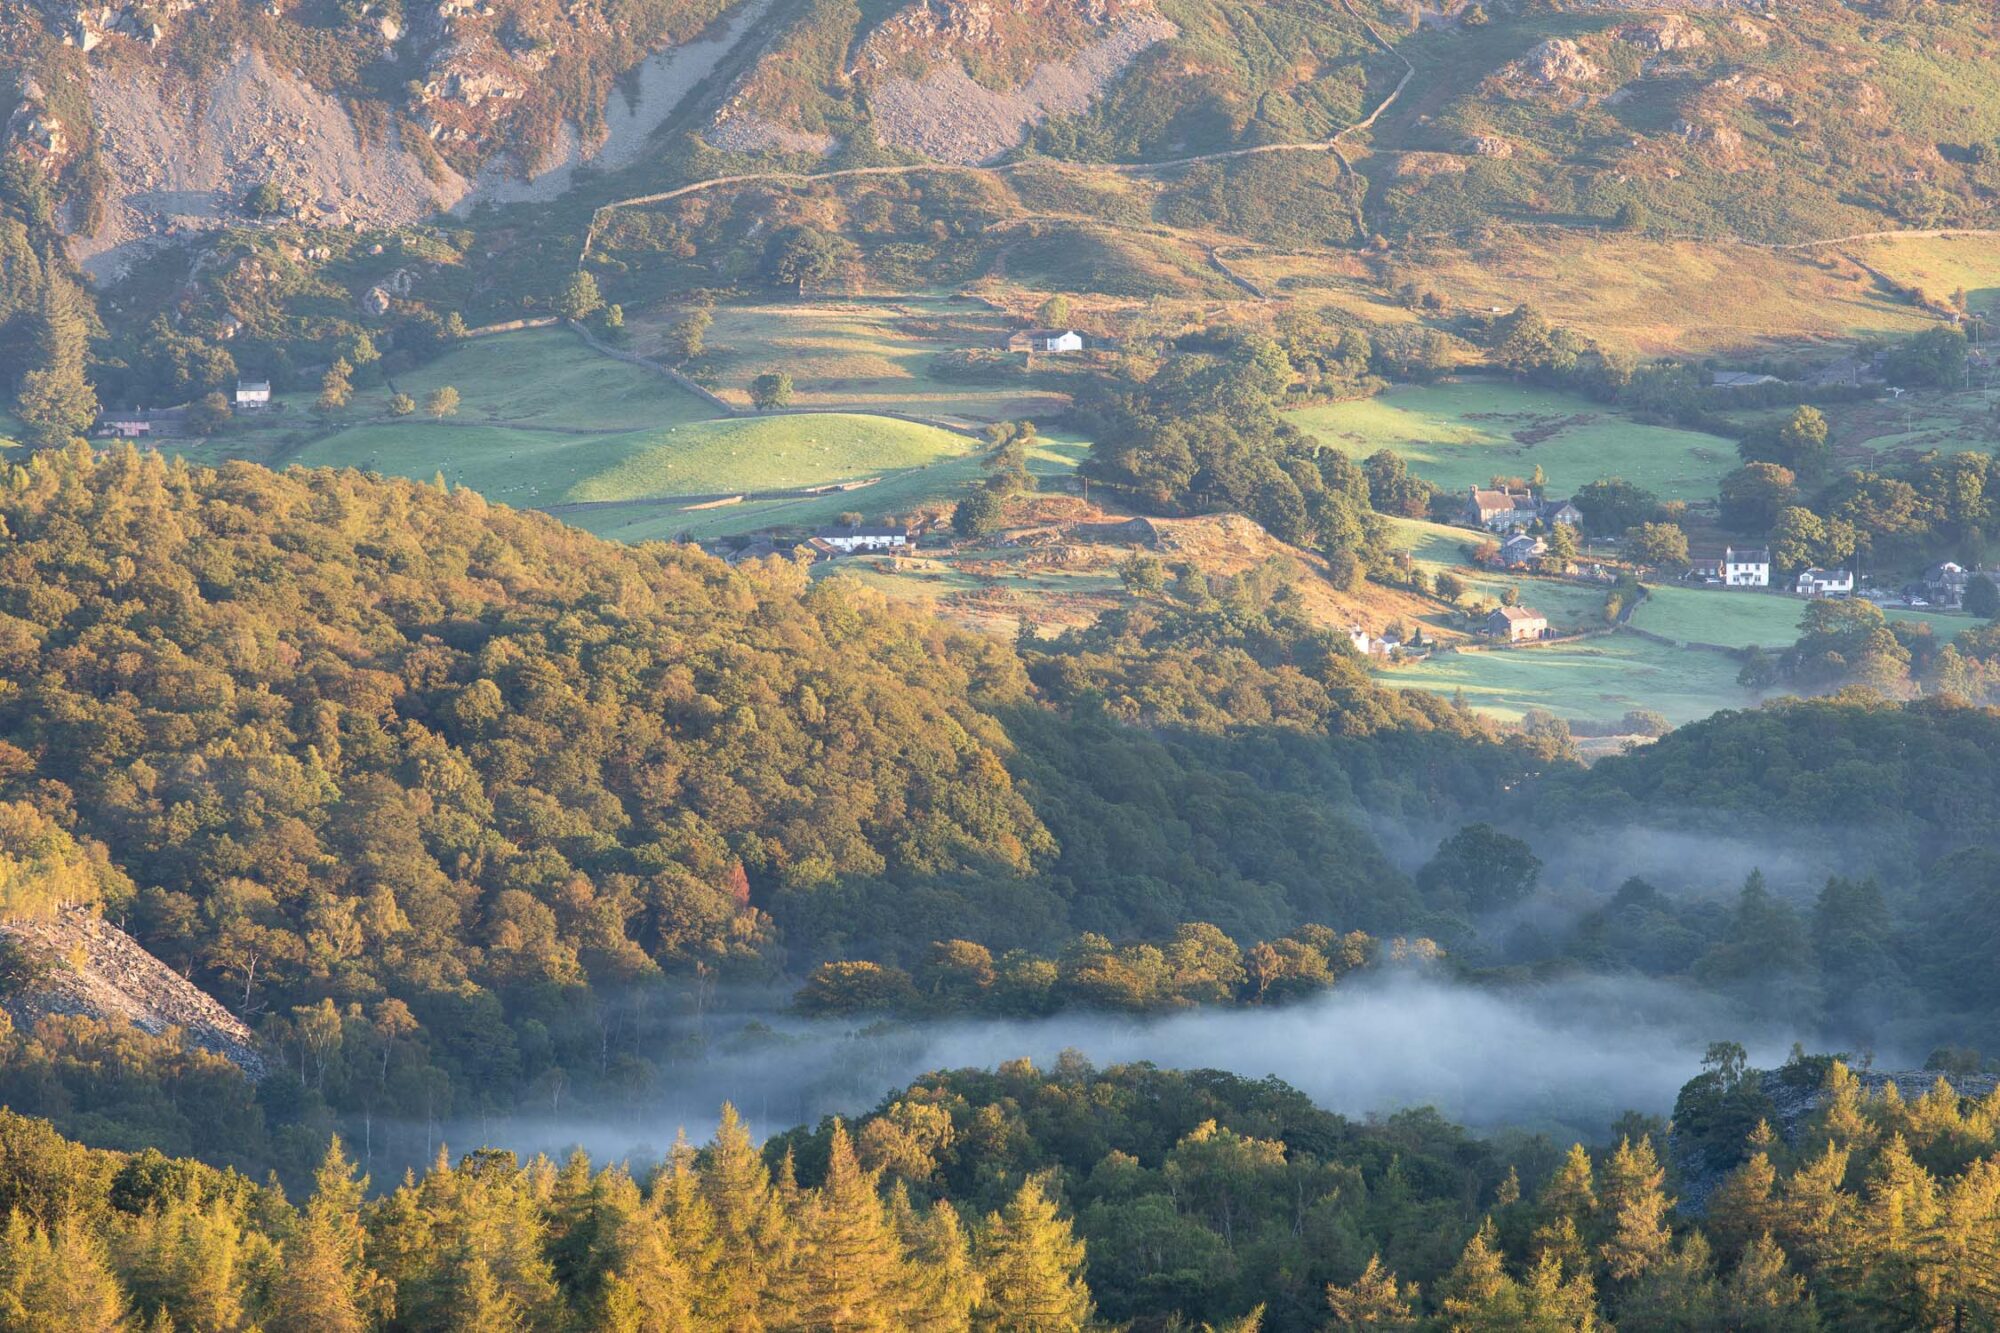
Firstly, a huge welcome to my detailed guide to landscape photography. After more than 15 years of working behind a camera, I have developed a strong comprehension of photography. I hope to pass on some of this knowledge to you.
Why have I created this guide? My goal is to promote landscape photography and the benefits of being outdoors. Landscape photography provides an excellent opportunity to voice your creativity. It is incredibly accessible, and everyone has the potential to create and share their amazing and unique stories.
Whether you are an enthusiast or new to landscape photography, this guide will hopefully answer any questions you may have.
With that said, please enjoy this guide and let’s get started.
Table of Contents
Introduction to Landscape Photography
Defining Landscape Photography
Let’s begin by defining landscape photography. The Royal Photographic Society defines landscape photography “as the photographic portrayal of all elements of the land, sea and sky whether natural or built or influenced by human endeavour. Examples include mountains, hills, farmland, coasts, bodies of water, forests and populated and industrial areas. Images may be created using traditional or other techniques (including but not limited to infrared, multiple exposures, intentional camera movement, abstraction, minimalism and post-processing”. (Royal Photographic Society, 2023) (1).
In simple terms, landscape photography involves capturing and preserving a moment in an outdoor setting, allowing photographers to explore and showcase the beauty of nature.
A Brief Overview of Landscape Photography
Long before the invention of cameras, humans have expressed a deep love for landscapes. For thousands of years, artists across the globe illustrated this love through paintings and similar art forms. However, some 200 years ago, an event occurred that would change the course of history. During the early 18th century, the French produced the world’s first permanent photograph. Little did they know, this was a crucial moment, leading to several groundbreaking advances in photographic technology.
Fast forward 200 years and camera technology continues to evolve. Even in our lifetime, most of us will have witnessed the end of the film era and the rise of digital technology. 1999 was a significant milestone in photographic history, paving the way for innovative developments of photographic hardware and software.
Landscape photography is about capturing the essence of a moment. A strong landscape photograph consists of a perfect blend of location, composition, and light. But don’t let this put you off. Landscape photography is an art that becomes easier with practice. Understanding the importance of light and composition will help you to develop and flourish as a photographer. Development is an exciting process, and with vast amounts of data available at your fingertips, expanding your knowledge has never been easier.
Key Influencers of Landscape Photography
Ansel Adams (1902-1984)
Over the years, there have been many significant influencers within the field of landscape photography. However, if you ask most enthusiasts or professional photographers for a list of inspirational names, odds are one person will rank highly. Ansel Adams.
Ansel Adams was an influential American photographer whose career spanned the 20th century. Adams was best known for his iconic black-and-white photographs. He was a true master of light, evident from his impressive portfolio. Throughout his career, Adams was highly commended and received a number of awards for his work, and rightly so. But, it wasn’t just his striking portfolio that made him stand out as a photography icon.
Between 1931 and 1932, Adams “participated in the formation of group F/64, a visual manifesto of “straight” photography intended to combat the shallow “salon” approach then prevalent” (Adams, 2020) (2). Straight photography refers to the art of capturing a scene or subject in sharp detail. Adams’s dedication to photography was unrivalled, his contributions towards the progression of photography as we know it were pivotal. It is easy to see why Adams continues to inspire photographers across the globe long after his passing.
Some of Adams’s most influential photographs include “The Tetons and the Snake River”, “Monolith, the Face of Half Dome”, and “Clearing Winter Storm”. Each and every photograph within Adams’s portfolio emphasised his true mastery of light and image composition.
Michael Kenna (1953-current)
Michael Kenna was born in 1953 in a town called Widnes, England. Kenna is a world-renowned photographer with a preference for black-and-white photography. With a deep understanding of light, Kenna often captures long-exposure photographs that truly push the boundaries of photography. Kenna states that some of his exposures “might last throughout the night” and “record details that the human eye is not able to perceive” (Kenna, 2023) (3). Similar to Ansel Adams, Kenna has made a wide range of publications, won multiple awards for his outstanding work, and completed work for high-profile clients.
Social Media and Landscape Photography Icons
Social media is such a powerful tool. Most of us are active on at least one social media platform. If used correctly, social media platforms can provide a lot of valuable information. Take natural landscape photography, for example. Many fantastic and experienced photographers actively engage on social media. For you as a budding photographer, this is great! You can access a pool of hints, tips, tricks, and location advice to help you on your photographic journey. Consider social media platforms such as Instagram, Twitter, Threads, Vero, Flickr, Facebook, 500px and YouTube. Modern-day landscape photographers are generally active across several platforms, meaning their content is widely available for you to access.
Do Not Neglect Local Landscape Photographers
Do not neglect local talent! There are a lot of incredibly talented landscape photographers out there. Do some research and find a handful of photographers who provide value. Follow and engage with those who positively influence you. Before you know it, you will have a feed full of valuable knowledge and inspiration.
There is no right or wrong answer when choosing icons to take inspiration from. Choose a handful who share your passion(s). Learn from them, and rekindle your creativity, but avoid losing your unique style. Maintaining your unique style will make you truly stand out as a photographer.
Why Landscape Photography?
We’re Surrounded by Stunning Landscapes
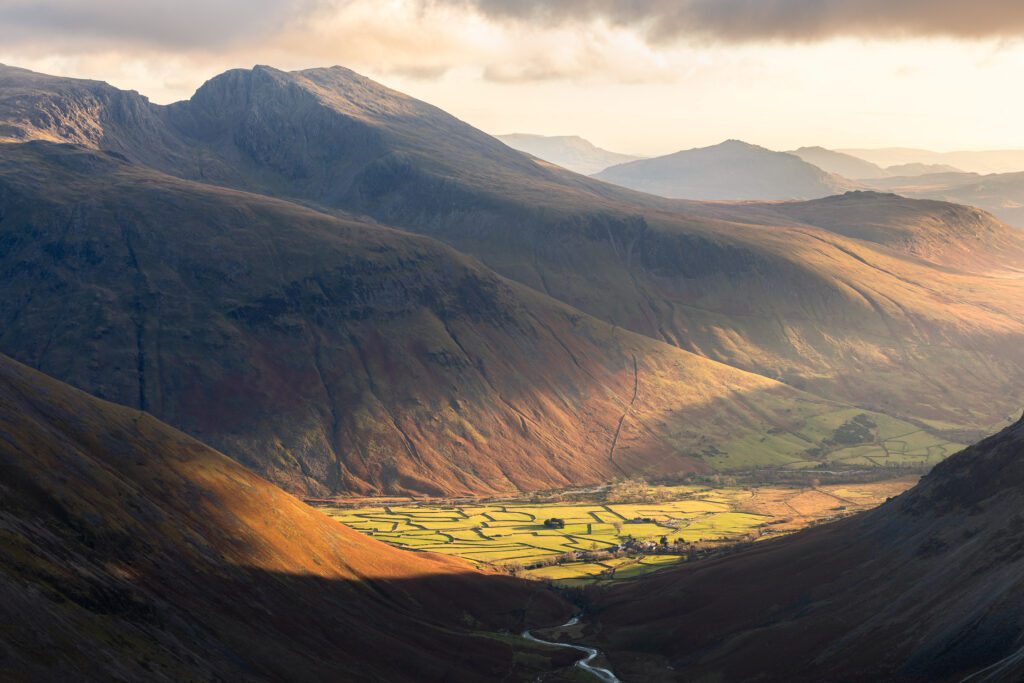
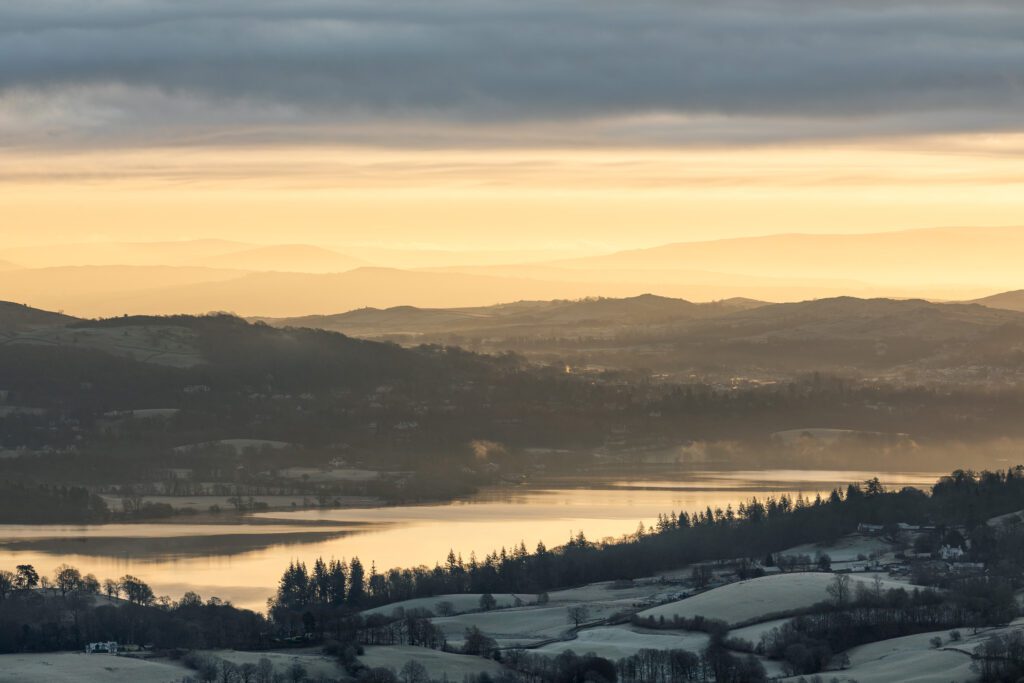
Whether living in a city or the countryside, each has its unique landscape. With this in mind, landscapes are one of the most accessible subjects for photography. Furthermore, changeable influences such as weather and seasons can provide endless options for landscape photography. No two photographs will ever be the same. Through trial and error and research, you can find the ideal conditions for your landscape, increasing your chances of capturing the photograph of a lifetime. Observing how light interacts with a landscape at different times of day can open up a range of creative possibilities. Being in the right place at the right time, you can capture stunning photographs from what may otherwise be considered an everyday scene.
At some point in our lives, we have all stood in a place outdoors that has taken our breath away. Whatever the location, urban or rural, photography provides the opportunity to create a permanent visual record of that moment in time. As a result, this opens up the opportunity for you to capture incredible moments as they unfold. Landscape photography is all about storytelling. It’s true, “a picture is worth 1,000 words”. A well-composed photograph tells the audience a story. What happened, where, and why? Photography also provides the power to influence. A strong and well-composed image can illustrate emotions and feelings, allowing your audience to share the moment with you as if they were there with you.
Finally, landscape photography gets you outdoors. Most of us lead busy lives filled with stress and other pressures. The outdoors is a fantastic soother of stress. Simply venturing outdoors for a walk can provide endless benefits for physical and mental well-being. Landscape photography gives you that extra incentive to get outdoors and explore. Whilst exploring outdoors, now and then, you will come across a scene that will catch your eye. Moments such as these are where photography comes into play. A camera will allow you to capture these scenes and relive the memories for many years to come.
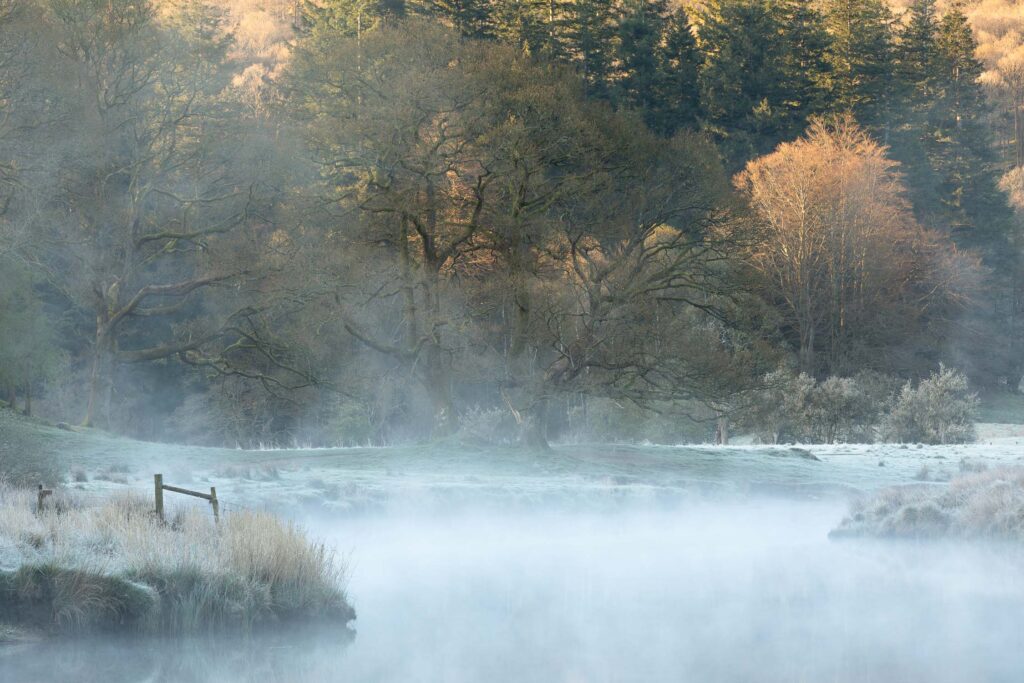
The Evolution of Photographic Technology
Modern-day landscape photography has never been more accessible. The substantial progression of photographic technology over the last decade or so is mind-blowing. Gone are the days when high costs created a barrier to entry. Nowadays, you can capture incredible photographs from a mobile phone and still maintain the ability to shoot RAW images for increased post-processing capability.
Back in the early 2000s, a major shakeup of the photographic market occurred and technology as we know it evolved. The demise of film cameras paved the way for a more advanced camera system, the DSLR. DSLR cameras are available with crop and full-frame sensors. A range of DSLR models with various specifications and price points caters for beginners to full-time professional photographers. As a result of this, DSLR cameras have long been the camera of choice for landscape photographers.
However, over the past few years, technology has evolved yet again. A new age of cameras has begun to take over the marketplace, the mirrorless camera. The technology is still young, but mirrorless cameras look set to displace DSLR cameras as number one. DSLR cameras have seen less development over the past few years. could indicate a marketplace transition to mirrorless. A list of key brands of DSLR and mirrorless cameras includes Canon, Nikon, Sony, Fujifilm and Panasonic.
Exploring Camera Equipment
What Camera is Best for Landscape Photography?
If this question was asked a decade or so ago, the answer would have most likely been a reasonably equipped DSLR, bridge, or medium-format camera. Sure, you could have captured photographs with your mobile phone but technology back then wasn’t anywhere near the level it is at today. Nowadays, the answer really is broad and depends on a few factors. Primarily budget, but also your level of passion for landscape photography. There’s also practicality. The best camera is the one you have with you at the time. With that said, let’s discuss some of the options in more detail.
Mobile Phone
Mobile phones represent a reasonably low investment option (most people already have access to a mobile phone). Modern-day mobile phone cameras are seriously capable bits of hardware. They are becoming increasingly powerful in low light conditions and the focus systems are becoming more intuitive. And then there are sensor sizes and dynamic range, both of which have advanced massively over the past decade or so. Perhaps not an ideal choice for printing large-sized archival prints but still more than capable for smaller prints and of course, social media. There’s also the fact that the majority of us carry mobile phones around wherever we go. This ties into the statement above – the best camera is the one you have with you.
DSLR Cameras
Digital Single-Lens Reflex (DSLR) cameras have been a major component of landscape photography for the past couple of decades. In their infancy, DSLR cameras disrupted the marketplace in the early 2000s by completely dislodging film cameras from their throne. Available with crop sensors (APS-C) and full-frame sensors, DSLR cameras have long appealed to a range of demographics from beginners/enthusiasts right through to professionals. In layman’s terms, a crop sensor is smaller than a full-frame sensor of 35mm and magnifies an image to provide a tighter field of view. The magnification varies by brand and is typically around 1.6x. This means that if you were to use a 200mm lens on a crop sensor DSLR, your lens would have an effective view of 320mm (200mm x 1.6).
DSLR cameras allow you, the photographer, to work with a range of focal lengths via the interchangeable lens capability. This results in significantly improved flexibility and enhances the ability to capture creative landscape photographs at various focal lengths. DSLR cameras also provide an extensive number of changeable settings that can be customised to suit your needs. Examples include ISO (the light sensitivity setting), aperture (the depth of field) and shutter speed. These three settings are better known as the exposure triangle. For those new to photography and looking for some easily accessible shooting modes, DSLR cameras provide a range of automatic shooting modes to help simplify the image capture process. DSLR cameras are able to capture RAW images for full creative control, and/or JPEGs for times when little editing is required.
Mirrorless Cameras
The principles of mirrorless cameras are fairly similar to that of DSLR cameras. The major distinction is that mirrorless cameras make use of electronic viewfinders as opposed to mirrors used within a DSLR. Because of this, mirrorless cameras are able to display live image projections that are responsive to camera settings. Mirrorless technology is still very much in its infancy, however, it is trending towards becoming a dominant player within the photographic industry. As technology continues to improve and mass production becomes more efficient, mirrorless camera systems will become more affordable within the marketplace. As things stand, mirrorless camera systems represent a fairly substantial investment though their benefits over DSLR camera systems are hard to ignore.
Generally speaking, due to a lack of notable new releases within the DSLR sector, mirrorless camera systems provide a greater dynamic range, a silent shutter and a true image live view. With this in mind, mirrorless cameras are trending towards dethroning DSLR cameras.
Medium Format Cameras
Medium format cameras possess features similar to that of the DSLR and mirrorless camera systems. The key difference is in the sensor size. Medium format cameras by definition have a sensor size larger than that of full-frame DSLR cameras (35mm). The benefits that accompany larger sensors include more pixels in images which allow for greater cropping flexibility. There’s also a general trend towards better image quality in terms of improved dynamic range, improved low-light capability and increased depth of field. All of this however comes at a price. Medium format cameras represent the highest-cost option of all of the cameras discussed in this section and generally appeal to professional photographers.
Which Camera is Right For Me?
To better illustrate which camera is right for you, please refer to the diagrams below. The diagrams consider a range of measures including technical benefits, affordability and ease of use. *Please note that diagrams are based on my perceptions of knowledge gained over the past several years. The information below is intended to provide insight and I recommend supplementing this with your research.

This ranking is based on the average price versus the perceived features and technical performance capabilities of the average-priced device.

This ranking considers the user’s experience level versus the ability to maximise the benefits provided by the specific device. Generally speaking, the greater the experience, the greater the ability to unlock and utilise the full benefits of the device.
Ultimately, there is no right or wrong answer. Within each camera category, there is a wide range of models. Camera models are positioned at various price points, catering for beginners/enthusiasts to fully-fledged professionals. There is also the technical ability. The more professional the camera, the more control you will likely have over various settings and features. Don’t just choose a camera because it is high-end, ask yourself, will you be able to unlock the camera’s full potential? If the answer is no, maybe consider a more suitable option to develop your skillset and advance from there.
Another question to ask yourself is, what is your end goal? If you are looking to heavily crop or print large images, consider camera options with larger sensors. If a wider dynamic range is a key factor, consider mirrorless options. Try before you buy and enjoy the purchasing process. Investing in a new camera is an exciting time, do your research and don’t be afraid to ask friends/family or experts for some extra guidance if required.
Focal Lengths for Landscape Photography
In short, there are no strict rules as to what focal length you can and can’t use for landscape photography. All focal lengths have the potential to deliver exceptional results. Regarding lens choice, there are several benefits to choosing variable focal length lenses. Having the flexibility to zoom in or out whilst composing an image is not to be overlooked. The ability to zoom offers much more creative freedom compared to using a fixed focal length (also referred to as a prime lens).
The Holy Trinity of Lenses
In most situations, landscape photographers call on the “holy trinity” of lenses. The holy trinity is a set of three lenses that cover 99% of all scenarios. The lenses are 15-35mm, 24-70mm and 70-200mm. The holy trinity is complimentary and collectively offers photographers the flexibility of wide-angle to telephoto zoom. Benefits of the holy trinity include a reduced need to switch lenses and a noticeable weight saving compared to the alternative of using prime lenses.
Ultra-Wide Angle Lenses
In certain situations, landscape photographers will call upon ultra-wide-angle lenses. Ultra-wide angle lenses have a focal length of less than 24mm (based on a 35mm sensor). Ultra-wide angle lenses have many uses, for example, cityscapes and landscapes featuring the night sky. However, lenses with a wide viewing angle can be tricky to use. Due to their large field of view, it can be easy to include unwanted elements in a photograph. Benefits of ultra-wide angle lenses include increased depth of field and the ability to create dramatic scale within images.
Super Telephoto Zoom Lenses
Long reach lenses are not quite as popular as the previous options. However, they are still worth covering in some detail. Super zoom telephoto lenses have a focal length of 300mm or more. Longer focal lengths allow landscape photographers to reach subjects dramatically further away. Also, super zoom telephoto lenses can help to declutter scenes. Filling a frame with a close subject means that there is less chance of including unwanted elements. The difficulty of using super telephoto lenses is a reduced depth of field for anything close to the camera. There is also the potential for camera shake, a leading cause of unsharp or blurry images. When handholding, it is recommended to have a shutter speed of the lens’s current focal length. For example, at 200mm, a shutter speed of at least 1/200th would be recommended. The larger the focal length, the faster the shutter speed is needed. To guarantee sharp shots with a super telephoto lens in low light conditions, photographers should ramp up the ISO setting.
Prime Lenses for Landscape Photography
A prime lens is a lens with a fixed focal length. There is a wide range of prime lenses available in the market, from ultra-wide angles to super telephotos. Unlike zoom lenses, prime lenses force photographers to move around their subjects. Lack of zoom can be a pro or con depending on which way you look at it. The obvious con is a lack of flexibility. The pro is that prime lenses promote creativity. Prime lenses tend to be optically better than zoom lenses providing sharper images. The biggest drawback to prime lenses is the number of lenses needed to cover popular focal lengths for landscape photography. This could also mean a greater need to change lenses more frequently whilst out in the field.
Additional Photographic Equipment
So, we have considered camera systems and lenses and briefly outlined the benefits and accessibility of each. Is there any other equipment required for landscape photography?
Aside from a means to capture a photograph in the form of a camera, every other purchase is complimentary and by no means necessary. There are several items, however, that will improve flexibility, boost creativity, and help maintain your equipment whilst out in the field. Let’s take a look at a few of the more popular items.
Camera Tripods for Landscape Photography
At the top of the recommended list is a good tripod. Tripods form a solid and stable platform for cameras. One advantage of using a tripod is the ability to photograph with slower shutter speeds. Slower shutter speeds can be used in a couple of scenarios. Firstly, in the case of low light conditions, a slower shutter speed can reduce the need to increase the ISO. Slower shutter speeds mean cameras are more prone to the effects of vibrations and camera shake, both of which lead to unsharp and blurry images. Tripods help to remove vibrations allowing photographers to use much lower shutter speeds and maintain sharp images.
Secondly, tripod mounting allows photographers to capture creative photographs emphasizing movement. An example of this is moving water, whereby shutter speed choice can massively impact an image. A slower shutter speed of a fast-moving river will result in the motion blur of the moving water, creating a sense of movement in a photograph.
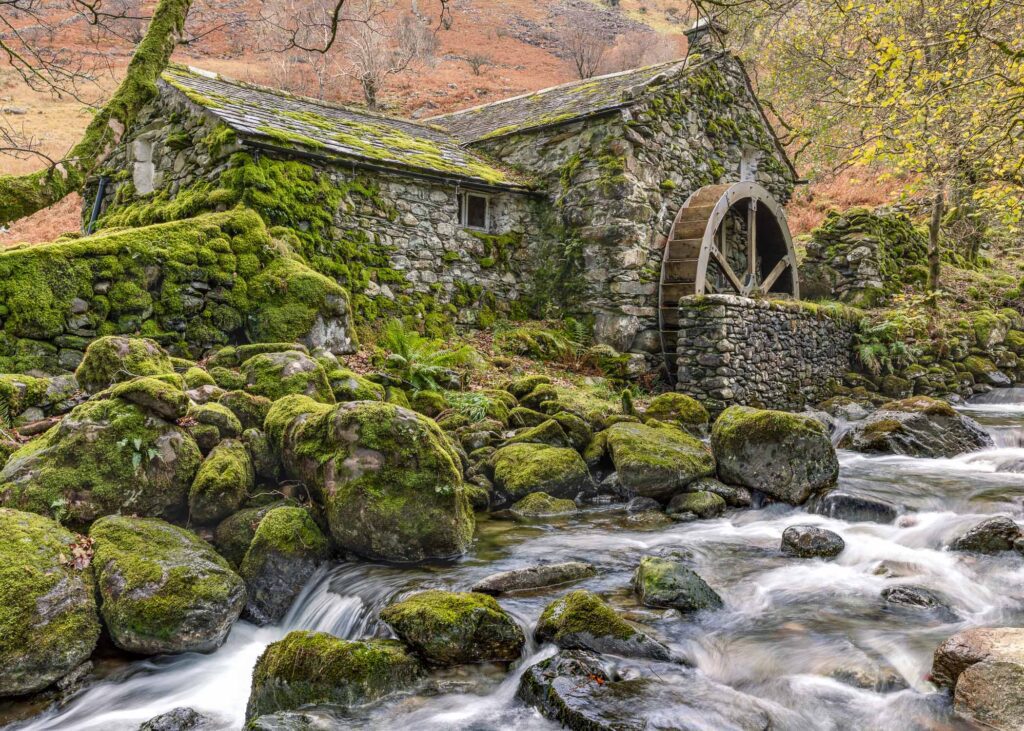
Camera tripods are available in a range of materials, including lightweight carbon fibre and heavy-duty aluminium. Consider the benefits of each as well as the overall weight, especially when travelling long distances with your camera equipment.
Camera Bags
A good camera bag is worth its weight in gold. There are many options when it comes to choosing a camera bag. Firstly, accessibility. Camera bags feature a range of openings for ease of access. Choosing one which suits your needs and with ease of access will put you in a great place for reacting to rapidly unfolding events.
Secondly, weight and size. As you begin to collect more and more camera equipment, weight and backpack size becomes crucial consideration. This is particularly important for those interested in mountain photography or any form of landscape photography that requires walking large distances. A good-sized bag with multiple compartments will allow you to safely transport your camera system and a range of lenses. However, don’t fall into the trap of carrying everything with you just because it will fit in your bag. Once you begin to expand your kit, it pays to consider your trips in advance and only carry the equipment you are likely to need.
Lens Filters for Landscape Photography
Lens filters are less important as of late given the advances in technology and software. There is a wide range of lens filters available in the marketplace including square polarising, circular polarising (CPL), neutral density (ND), graduated neutral density (ND Grad) and UV filters. Some filters are arguably more useful than others so let’s take a look at each filter in a little more detail.
Graduated Neutral Density Filters
Graduated ND filters were designed to help correctly expose dynamic scenes. For example, extremely bright skies with dark foregrounds. Nowadays, they’re somewhat redundant as a result of the ability to bracket images within camera systems. Bracketing simply put is a method of correctly exposing an image by taking a series of different exposures and combining them in post-processing. In this case, you would expose for the highlights, the shadows and midtones before merging the shots in post-processing software such as Adobe Lightroom or Photoshop. ND graduated filters also prove difficult to use in any landscape scene where elements cross the horizon. For example, mountains, buildings, or trees.
Neutral Density Filters
Neutral Density filters are available in a range of options. Their primary role is to reduce the amount of light hitting your camera’s lens. This may seem odd, but in practice, it opens up a range of creative possibilities. During lighter periods of the day, you might want to photograph moving water for example and capture motion blur. This may not be possible during certain times of day using native camera settings. However, with the use of an ND filter, you can reduce the amount of light reaching your camera’s sensor. This means that you can achieve slower shutter speeds allowing you to capture motion blur during daylight hours.
ND filters are available in a range of different densities and can be stacked to cater to your situational needs.
Polarising Filters
Arguably the king of filters and still commonly used throughout the landscape photography community. A polarising filter’s job in a nutshell is to reduce reflections and increase saturation and contrast within an image. Polarising filters are extremely useful in scenes that feature reflections. Water, leaves and glass for example. Within woodland photography, polarising filters are extremely helpful for removing harsh light reflections from leaves which may be wet after rainfall.
Polarisers are available in square or circular formats. Circular polarisers (CPL) generally screw directly in front of your lens’s front element via the threaded section. You will need to buy a CPL with the correct thread size for your lens (each lens is different). You can refer to your lens’s user manual to discover the correct thread size.
UV Filters
UV filters do exactly as they suggest. Their role is to block out UV rays from the sun. They are not commonly used however, they can be particularly useful in scenes featuring unwanted haze. It used to be widely recommended to apply a UV filter to your lenses in order to protect the front element from damage. However, as with putting anything in front of your camera’s lens, doing so can potentially have a noticeable impact on image sharpness.
Camera Cleaning Equipment
Without going into too much detail, a good set of cleaning equipment always comes in handy when out in the field! Any time your camera is in use, it is exposed to dust and debris from your working environment. It is always good practice to keep your lenses clean to ensure that you achieve the best quality photographs.
Lens Blowers
A lens blower has many uses and is a cheap and efficient way of removing dust and debris. By using a gentle directional flow of air, you can dislodge dust and debris from your lens or camera’s sensor prior to further cleaning with appropriate tools.
Lens Cloths
It is always useful to carry a lens cloth around with you at all times. Typically in microfibre form for gentle cleaning, microfibre cloths are great for removing light dust and water droplets caused by rain or spray from waterfalls or crashing waves.
Lens Wipes
Specialised wet wipes for cleaning lens elements. Lens wipes are great for removing stubborn grime from lens elements and pair well with a lens blower. It is recommended to buy lens wipes that are designated as fine to use on photographic lenses.
Sensor Cleaning Kit
Definitely not one to carry out into the field with you, although worth a mention. Every time you change lenses outdoors your camera’s sensor is exposed and over time can collect unwanted dust and debris. With this in mind, it is good practice to routinely clean your camera’s sensor and remove dust spots which may have a visible impact on your images. Sensor cleaning can be carried out with the use of a dedicated sensor cleaning kit.
Effectively, a sensor cleaning kit consists of a cleaning liquid and a swab specific to your camera’s sensor size. Its role is to remove any grime or stubborn dust spots from your camera’s sensor. There are many useful video guides available for sensor cleaning and it is recommended to do some research before attempting this. Alternatively, if you do not feel comfortable cleaning your camera’s sensor, many leading photographic stores will offer a sensor cleaning service.
Sensor cleaning is best done in a clean, dust-free environment so please do not attempt this outdoors.
Final Landscape Photography Considerations
Post-processing Your Landscape Photographs
Post-processing your photographs offers a real opportunity to develop your own unique style. When it comes to capturing your landscape photographs out in the field, it is highly recommended to shoot RAW. A RAW file type is much larger in size due to the fact that it contains a vast amount of valuable data. This data can be called upon in editing software to unlock the full potential of a photograph.
Post-processing allows you to bring your photographs to life by allowing adjustments to settings such as colour profile, exposure, white balance, saturation, contrast and sharpening. Adjustments are applied globally or locally using a range of masking tools. Advanced settings include the ability to colour grade and manually adjust luminance, saturation, and the hue of individual colours. If you over-exposed a photograph in the field, you can correct it in post-processing software. Without going into too much detail, be careful not to clip your images. Clipping refers to lost data, typically within shadows or highlights caused by photographs which are too under or over-exposed.
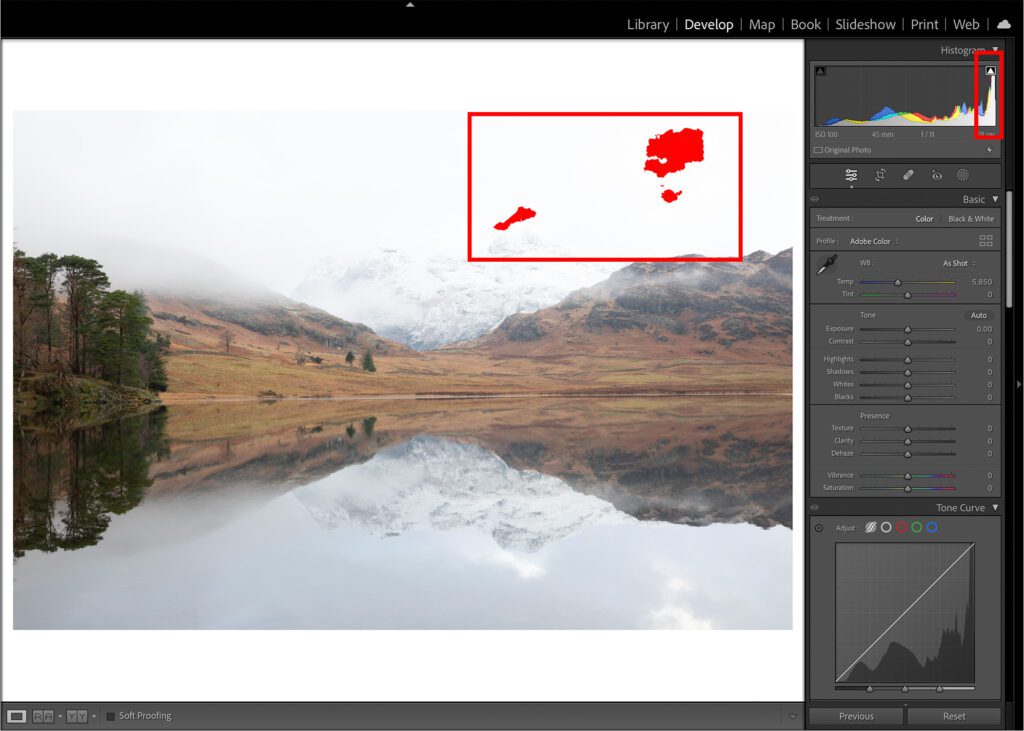
An example of an image displaying clipped highlights. This is indicated on the right-hand side of the histogram. The clipped highlights can be seen in the image, highlighted in red.
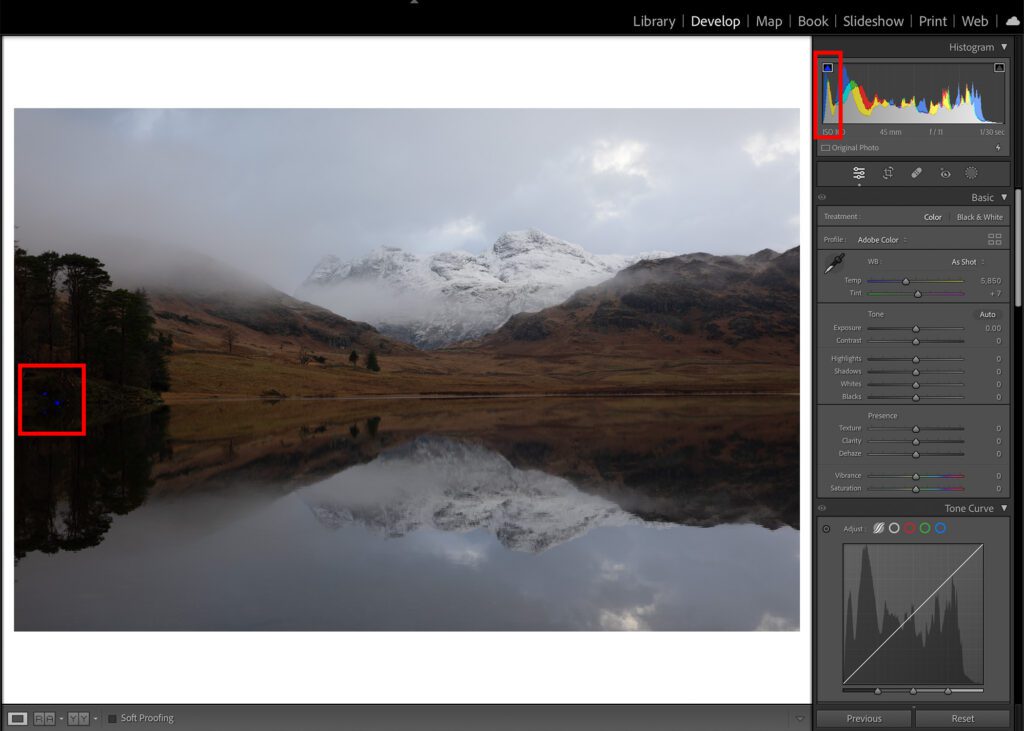
An example of an image displaying clipped shadows. This is indicated on the left-hand side of the histogram. The clipped shadows can be seen in the image, highlighted in blue. Both images were part of a sequence of bracketed photographs
Post-processing software also allows you to organise your photography. Once you begin to collect more photographs, good organisation becomes crucial. Post-processing software offers a range of organisational tools which can help improve your workflow and organisation. For example, you can flag, colour code, rate, and add image tags to help reference your photographs. Image tags are incredibly beneficial. Tagging images with meaningful keywords allows you to call upon specific tags at any time.
There is a wide range of post-processing software in the marketplace. Popular choices include Adobe Lightroom and Photoshop, DxO Photolab and Capture One. Software choice is personal. Many software providers will offer free trials to give you a taste of performance and available features.
Print Your Landscape Photographs!
Print your landscape photographs! Seeing the results of your hard work in printed form is honestly something else. Printing is a whole other art form and represents an exciting new creative stage within your photography journey. The biggest takeaway from printing would be to really consider your paper types. There are many different paper types when it comes to printing your photographs. Consider matt, gloss, metallic, and satin. Each paper type will impact the tone, saturation and contrast of your image. Once you become more and more experienced at post-processing and printing you can begin to consider ICC profiles.
Colour Management and ICC Profiles
What is an ICC profile? International Colour Consortium (ICC) explains that “device profiles provide colour management systems with the information necessary to convert colour data between native device colour spaces and device-independent colour spaces” (4). Effectively, ICC profiles will allow you to more accurately visualise how a photograph will look when printed via a specific printer to a specific paper type. Each paper type will have its own ICC profile which can be loaded into your design software. Using Adobe Lightroom as an example, once ICC profiles have been installed, you can soft-proof an image and visualise how it will look when printed to a specific paper type. ICC profiles are typically freely available for download on printers’ websites.
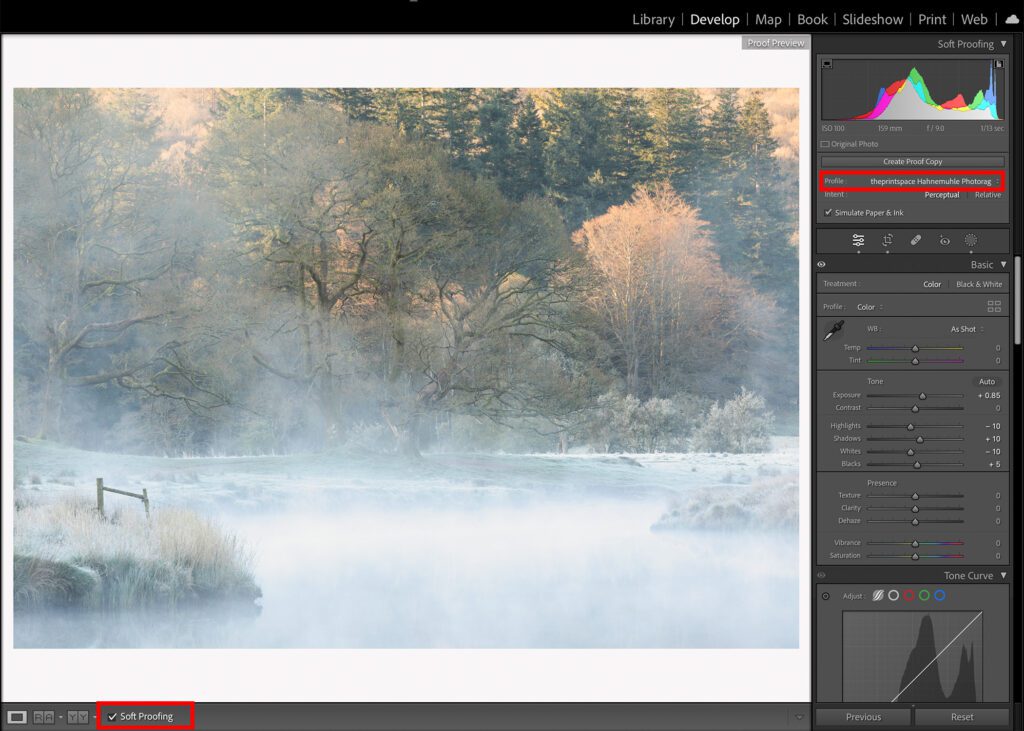
Look out for a more in-depth guide to printing which will be released in the near future.
Camera Insurance
So, you have decided on a camera system. Brilliant! Before you dash off into the great outdoors, it’s worth considering dedicated camera insurance for complete peace of mind. Camera insurance provides a range of cover options protecting your valuable equipment from accidental damage, theft, and malfunction. For professional use, policies also include liability cover. There are a range of photographic insurers including Eversure, Ripe Insurance, photoGuard and PolicyBee. Shop around and get the best quote tailored to your needs.
Join a Local Photography Community
What better way to learn than being surrounded by like-minded individuals? Joining a photography community can be extremely beneficial. You can develop your skills faster and support each other on your exciting path to becoming experienced landscape photographers.
Get the creative juices flowing. Being part of a community allows you to bounce ideas around significantly boosting creativity. You also have instant access to a source of feedback. Feedback is an important part of the development process. Don’t underestimate the power of good feedback and/or constructive criticism.
Most importantly, make new friends!
Share Your Photography Via Social Media
Social media is a powerful tool and usage is significant across the globe. You are now able to share images and updates with potentially billions of people across the world. With a consistent presence and a portfolio of captivating content, you can build an organic following and gain valuable feedback on your photography. Social media is also a great source of inspiration as long as you use it correctly. Follow like-minded people who can add value to your landscape photography.
However, do not fall into the trap of comparing your work to that of others and do not lose sight of your own personal style. It can be an easy trap to fall into but with the right mindset, you can remain true to yourself. Post the content that makes you happy, everything else is a bonus!
Finally, be creative. Express your ability and your passion. Record short videos of photo shoots and let your audience experience how you felt whilst out in the field.
Useful Photography Terms
Below is a list of common photography terms and a brief description of their meaning. These terms apply to all aspects of photography and are not limited to landscape photography.
| Term | Description |
|---|---|
| ISO | ISO is a value that determines your camera’s sensitivity to light. Higher ISOs are needed for low light conditions but this comes at the cost of introducing noise into your photograph. |
| Aperture | An aperture is a opening which allows light to pass. Wider apertures are represented by lower F stops – typically F4 and below. Narrow apertures are generally considered F8 and above. Narrow apertures provide a greater depth of field than that of wide apertures. |
| Shutter Speed | Shutter speed refers to the speed at which the shutter of the camera closes. The bigger the number, the faster the shutter speed. |
| Exposure Triangle | The exposure triangle is a balance of ISO, aperture and shutter speed. Adjustments to any of the three settings will influence the balance of the triangle. |
| Focal Length | A focal length is the angle of view. A wider focal length of 16mm for example will have more elements in frame than that of a narrow 400mm focal length. |
| Depth of Field | Depth of field is closely tied to aperture and determines how much of a scene will be in sharp focus. Generally speaking the wider the aperture the smaller the depth of field. |
| Exposure | Exposure in a nutshell is how much light reaches your camera’s sensor during a pre-determined time i.e. your shutter speed. |
| White Balance | White balance refers to an in-camera adjustment that can be made to make colours appear more natural in given lighting conditions. |
| Dynamic Range | Dynamic range is the variance of light and shadows within an environment. High dynamic range refers to a significant difference between extreme highlights and extreme shadows. Some cameras may struggle to process scenes with high dynamic range, thus requiring the need to bracket or make use of filters. |
| Bracketing | Bracketing is a means of capturing several images at varying exposure settings to overcome high dyanmic range scenes. Photographs exposed for highlights, shadows and midtones can be merged in post-processing software to create a finely balanced exposure. |
| Noise | Noise is a random variation of light signals. It is often introduced into photographs as a result of using higher ISO values in low light conditions and is particularly visible when viewing magnified images. Noise can present itself in two ways, luminance noise and colour noise. |
| Composition | Composition refers to the balance and framing of the elements within an image. It defines how the audience is led through a scene. There are a number of techniques for successful compositions such as leading line diagonals, S-curves, and use of negative space. |
| Focus Point | A focus point is a means of informing your camera of where you would like it to focus. In other words, the part of a scene you would like to be more sensitive to changes in contrast and therefore appear sharpest. |
| Aspect Ratio | An aspect ratio is the relationship between the height and width of an image. Full frame for example equates to 3:2. A-sized papers have an aspect ratio of 1:1.414. |
| RAW | A RAW file is an unprocessed image file that contains a vast amount of data which can be called upon when it comes to post-processing. RAW image files provides extensive post processing capability as opposed to JPEG. “Shooting RAW” is highly recommended as a landscape photographer. |
| JPEG | A JPEG is a globally recognised compressed image type. JPEGs do not offer the same flexibility in terms of post-processing due to a number of settings and values being determined at the point of image capture. |
| Histogram | Put simply, a histogram is a display of the distribution of light within an image. From left to right a histogram provides data on shadows, mid-tones, and hightlights. Do not push the histogram too far left or too far right by under or over-exposing an image – this will cause clipping. |
| Clipping | Clipping refers to a loss of data in an image typically caused by the under or over-exposure of an image. |
References and Helpful Resources
References
(1) Definition of landscape photography. Accessed from the Royal Photographic Society, 31st July 2023. Source link: https://rps.org/groups/landscape/competitions-page/
(2) Ansel Adams (The Camera), The Ansel Adams Photography Series 1, 2020. Page X
(3) Michael Kenna Resume. Accessed 10/08/2023. Source link: https://www.michaelkenna.com/
(4) International Colour Consortium (ICC) – ICC profile definition. https://www.color.org/iccprofile.xalter
Helpful Resources
Wex Photographic – for all of your photographic purchase needs https://www.wexphotovideo.com
MPB – credible source for used camera equipment https://www.mpb.com/en-uk
Theprintspace – carbon neutral fine art printing based in London – https://www.theprintspace.co.uk
Additional Help
If you would like any further information on anything discussed in this guide, please feel free to contact me.
Thanks for reading if you made it this far! I hope this guide was helpful to you and has answered some questions you may have had about landscape photography. Please consider my other guides (coming soon).

