Tawny owls may be the UK’s most common owl, but finding them, let alone photographing them, is far from easy. In this short guide, I share how I locate and ethically photograph tawny owls and tawny owlets in their natural habitats using fieldcraft, patience, and an understanding of their behaviour.
An Introduction to Tawny Owls
Tawny Owls (Strix aluco) are the UK’s most common owl and are fully nocturnal. Their call is unmistakable; a quintessential countryside vocal. The males produce the iconic “whoooo”, answered by the female’s sharp ” kew-wick”. If you haven’t heard them before, a great place to listen out for them is near dense woodlands after dark.
Tawny owls favour quiet, mature woodlands, often hunting along the edges for wood mice and voles. Tawny owls pair for life and are highly territorial, defending their territories all year round.
As with all wildlife throughout the UK, tawny owls are protected by the Wildlife and Countryside Act 1981. They are not currently in Schedule 1; however, their population is sadly declining, giving them an amber conservation status.
For a more detailed look into how I locate tawny owls, my early-spring Field Notes post talks through my fieldcraft-led approach.
What Are the Challenges of Photographing Tawny Owls and Owlets?
Despite being our most common owl, tawny owls are notoriously difficult to find and photograph ethically. Their nocturnal habits mean most of their activity happens under the cover of darkness. While some photographers use flash or continuous lighting to photograph them after dark, I don’t believe in this approach. I prefer to capture them respectfully during daylight hours, photographing them from a distance as they naturally roost under the summer canopies.
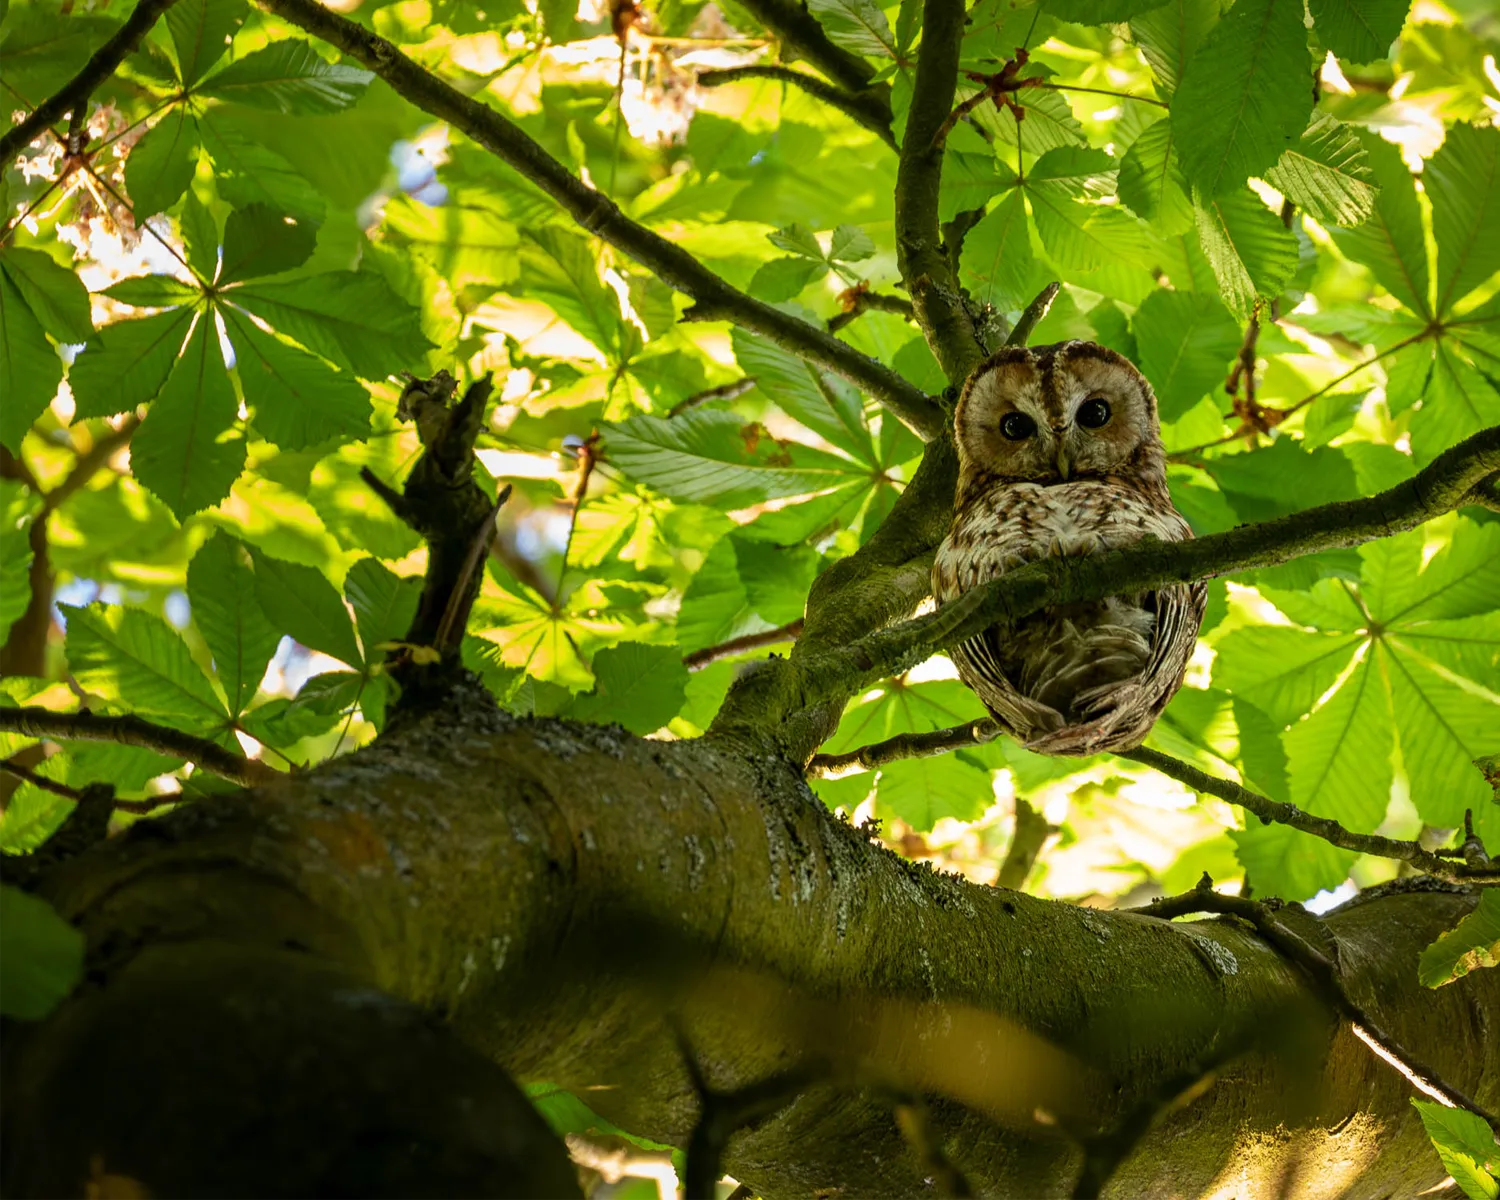
Tawnies are also masters of camouflage. Their plumage blends seamlessly into the bark and shadows of the woodland, making them almost impossible to spot, even in commonly used roosts. Even though I’m lucky enough to have three successful breeding pairs in my local area, tawnies remain one of my least-photographed birds of prey.
Under full summer canopies, woodlands can block most of the available daylight, making photography far more demanding than people might expect. Dark, layered shade will push your camera’s low-light capability to its absolute limits, even during the middle of the day. To put this into context, my starting point is ISO 3200, and this barely gives a shutter speed fast enough to capture sharp images of perfectly still perched owls.
Above: A pair of roosting tawny owlets photographed from a public path alongside a woodland at 560mm, ISO 6400, 1/250th, f/5.6.
During the breeding season, tawny owls are fiercely protective of their young, and it’s not unheard of for them to strike humans who venture too close. Respecting their space is ethical, and it prevents you from falling victim to their razor-sharp talons.
How Do I Locate Tawny Owlets Respectfully?
Owlets, ironically, are much easier to locate than their parents, but only if you understand their behaviour and know what to listen out for.
Most of my work photographing owlets begins well in advance of the breeding season (mostly through autumn and winter). Over the past several years, I’ve spent countless hours exploring local woodlands through every season. Most of the time, I’m photographing wildflowers and anything else that catches my eye; I’m very rarely out specifically looking for tawny owls.
Naturally, the more I explore my local woodlands, the more I come across signs of activity, one of the most common being owl pellets. Finding owl pellets scattered on the forest floor is a telltale sign that a roost is nearby, and it helps me map hotspots and favoured trees. When spring comes around, I know to check these trees from a distance, as there’s a good chance of spotting branching owlets when the time comes.
Listen out for the distinct calls of tawny owlets
Tawny owlets are surprisingly vocal. Most of the time, I’m able to locate them purely by sound. They’re most active during the night, but it’s not unusual to hear them during the daytime. If you’re unfamiliar with their call, the best way I can describe it is like a broken dog toy; it’s almost like a muffled, hissing version of the females’ kew-wick.
Never use playback in the field, but I recommend familiarising yourself with their calls from home before you head out. If you’re walking through productive woodland at the right time of day during peak season, you’ll almost certainly hear them. Their call is a demand for food from their parents, and typically, the one who shouts loudest gets fed first.
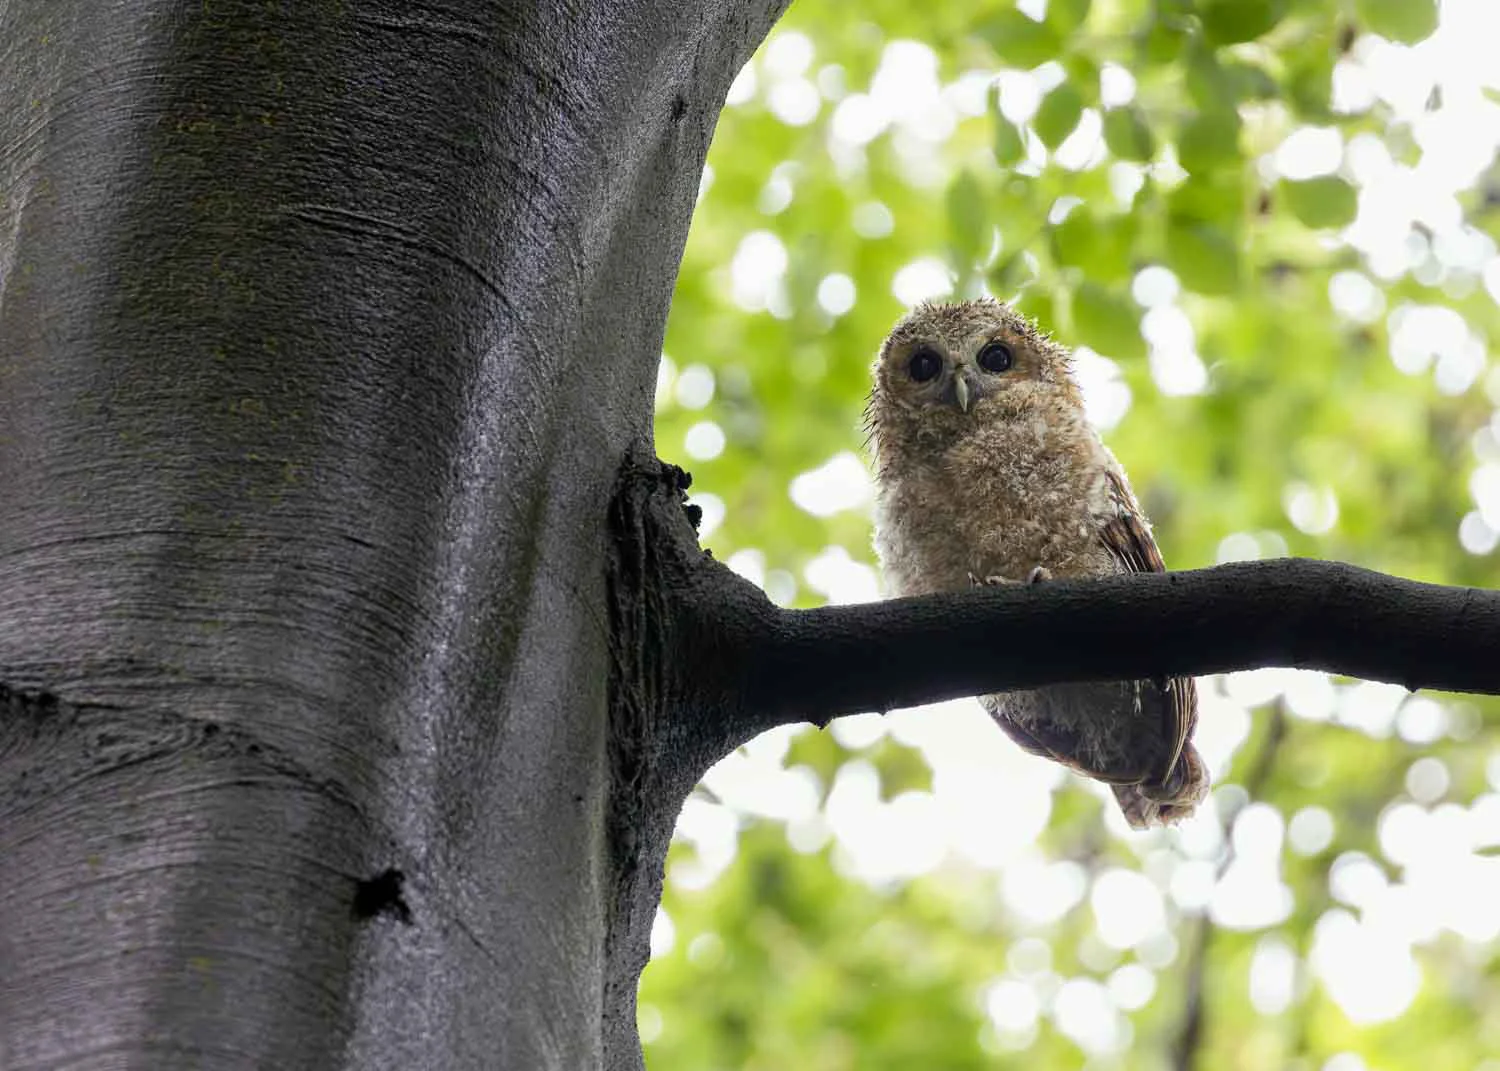
The branching phase
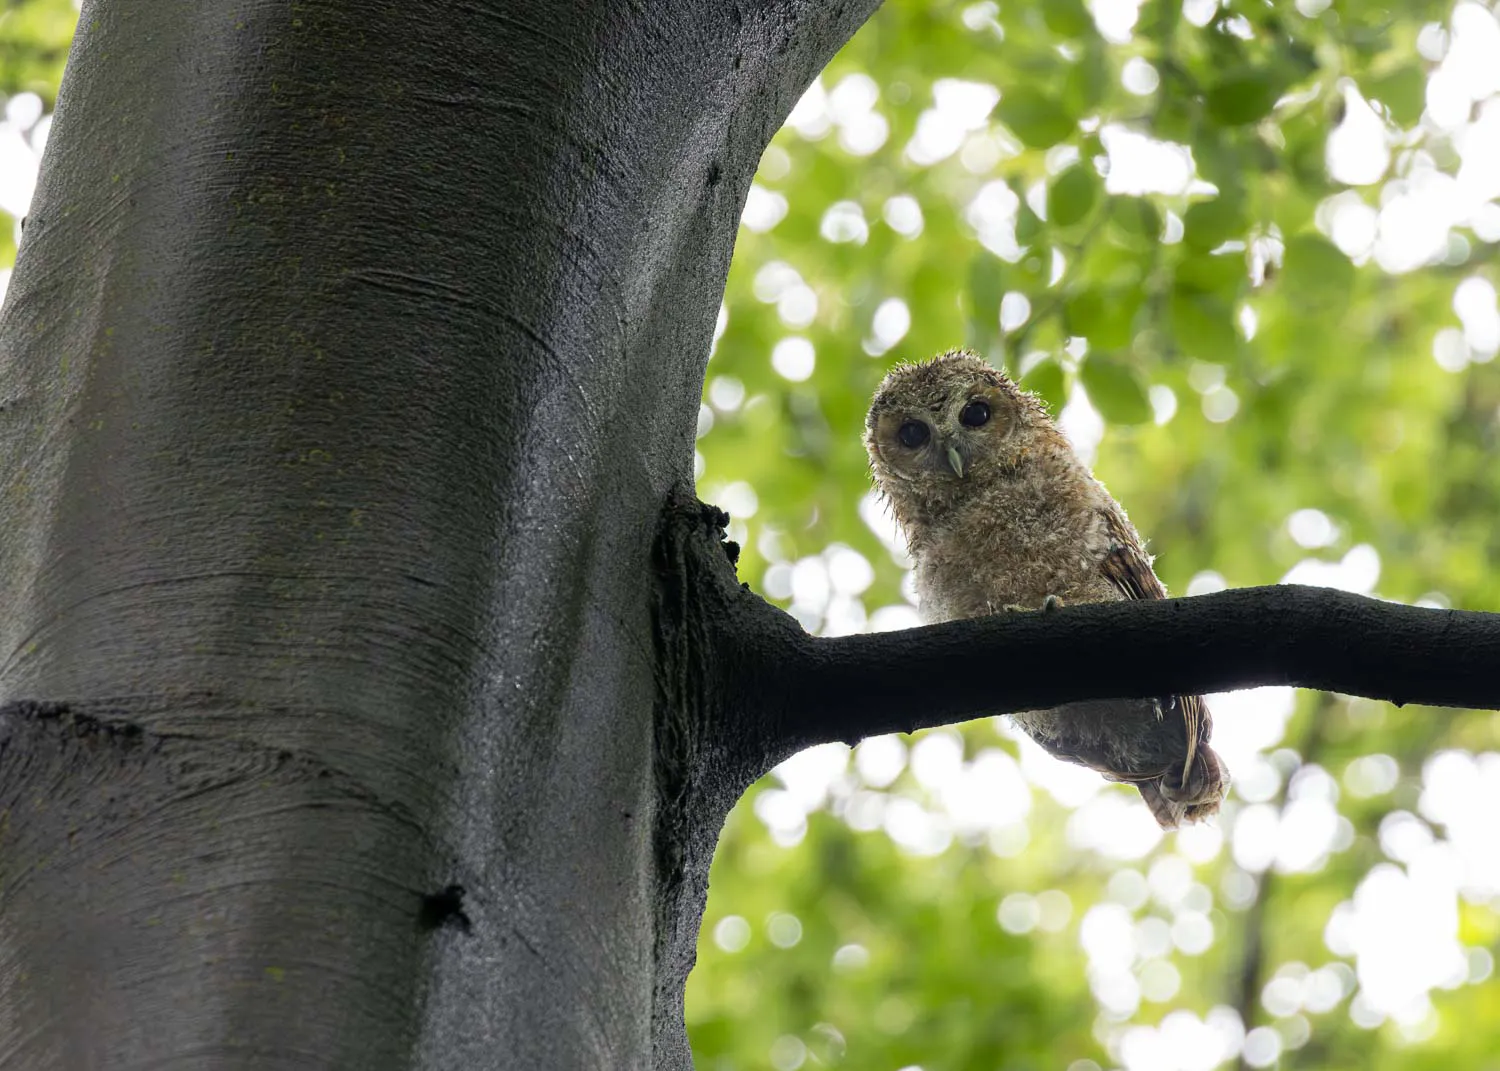
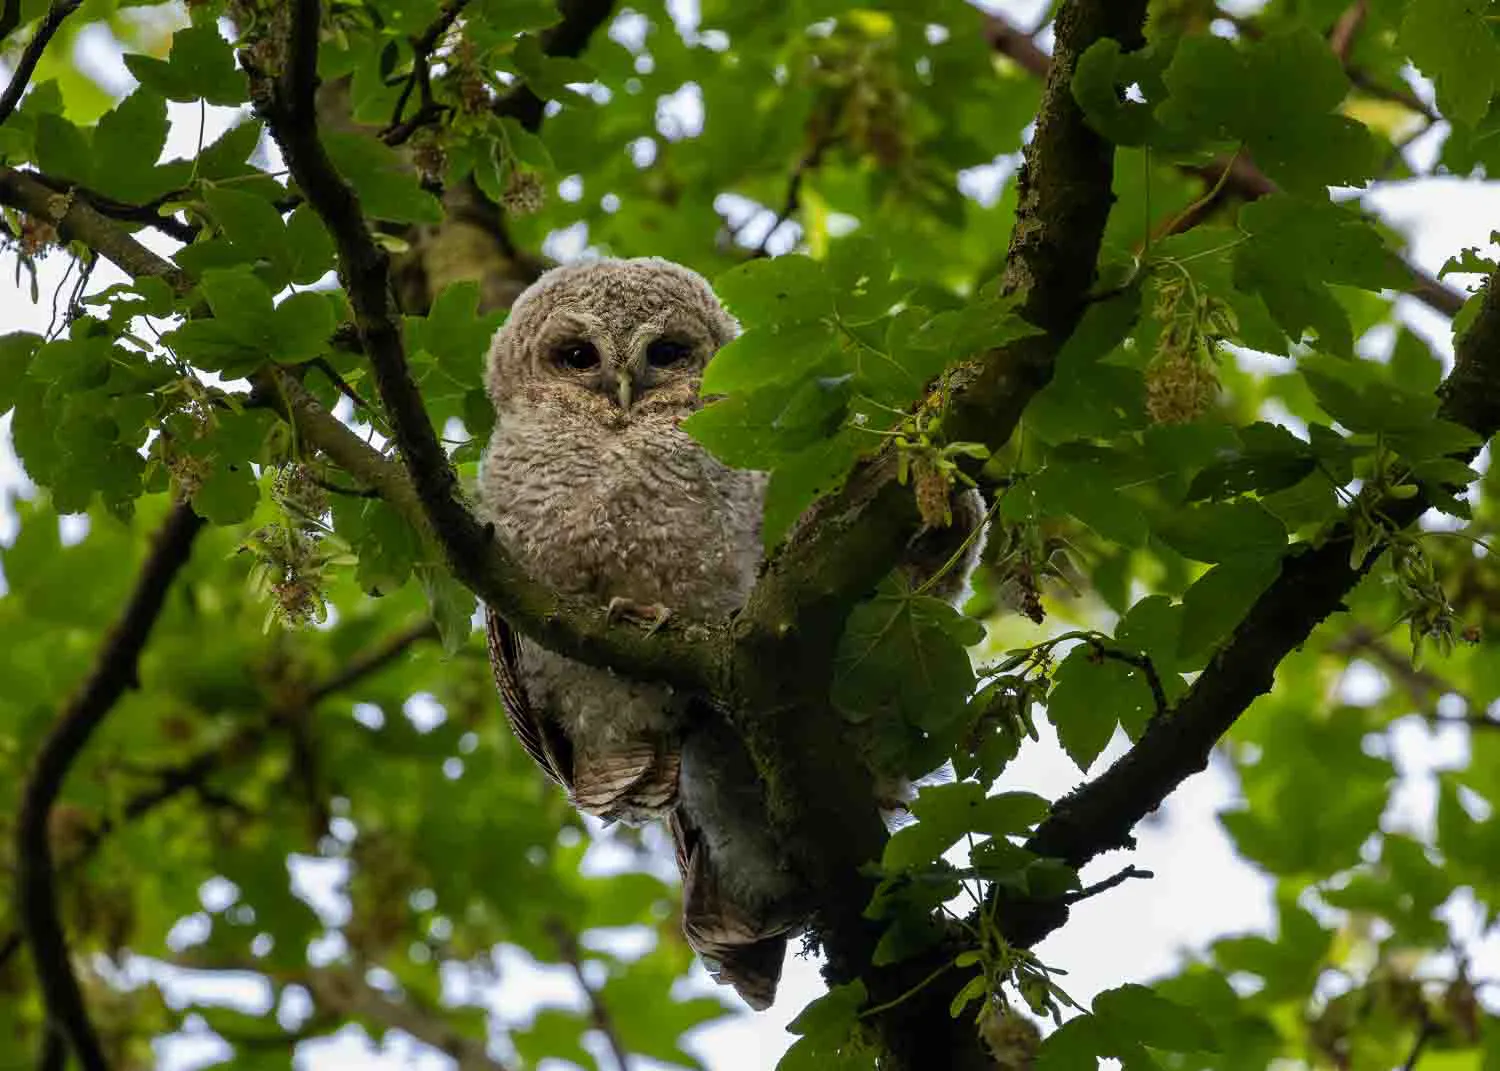
Tawny owlets leave the nest at a surprisingly young age. At around four weeks of age, they enter their branching phase. Although they can’t fly at this age, they’re naturally strong climbers, using their beaks and talons to haul themselves between branches (hence the “branching” phase). They often find safe, sheltered spots under the canopy where they’re protected from the elements and potential predators.
In my opinion, the branching phase is the golden opportunity for photography, as long as you’re respectful and keep your distance. It’s a great opportunity to capture intimate moments such as groups of huddled-up resting owlets. It also allows you to illustrate vulnerability and resilience. Despite being so exposed, they quickly adapt to life outside the nest. Within a week or so, they start to make their first short, clumsy flights between branches as their muscles begin to strengthen.
When the branching season arrives, the first places I check are the trees I scouted earlier in the year. The benefit of scouting in advance is that I can keep a respectful distance and scan the trees from afar. When I’m looking for branching owlets, I’m looking for any shapes or colours that don’t belong. It sounds difficult at first, but it becomes second nature in no time. I tend to prioritise checking areas that offer plenty of leafy cover. Many of the trees in my local woods are covered with ivy, which offers owlets plenty of shelter from the elements.
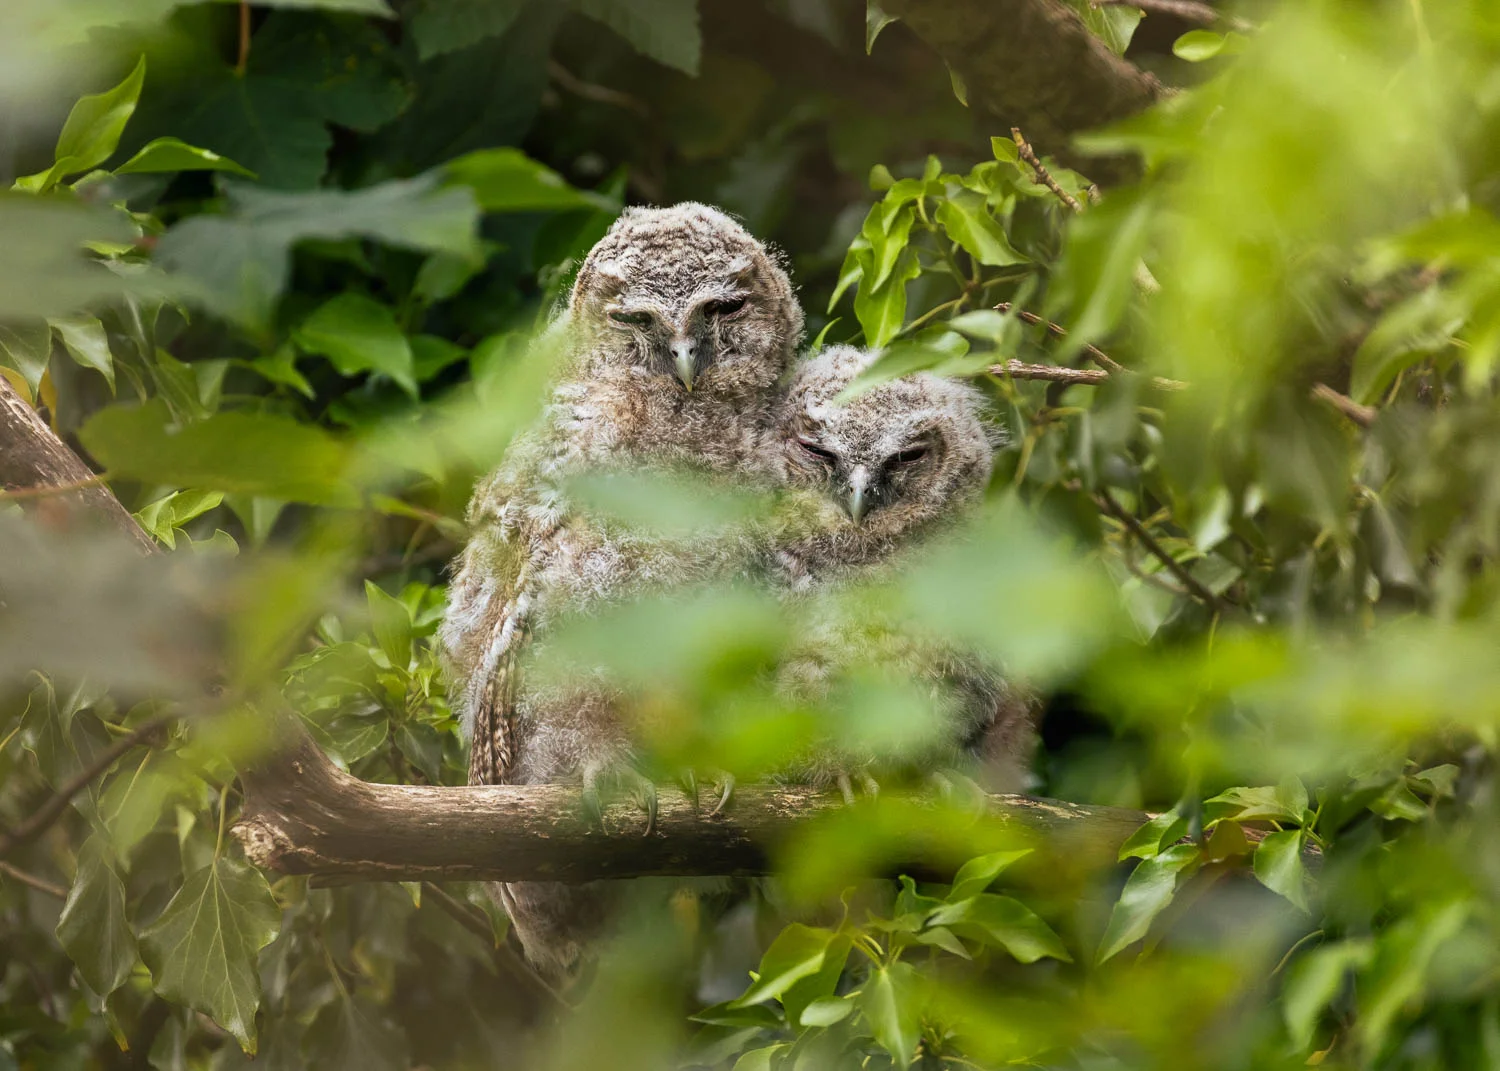
Above: A dream opportunity capturing two branching tawny owlets sleeping huddled together, surrounded by dense ivy and leafy cover. Settings: 560mm, ISO 1600, f/8, 1/500th.
My Approach to Photographing Tawny Owlets
When I spot tawny owlets, the first thing I do is check that they’re resting. I have no desire to disturb them, and by keeping my distance, they usually never know I’m there. Most of the time I find them during the daytime, and they’re fast asleep. But occasionally, they’ll surprise you. After almost a full day of torrential rain recently, I popped out to my local woods only to find the owlets actively whizzing between branches and calling out in broad daylight. I guess they were drying themselves off; the poor things looked soaked! Watching from a distance was an unforgettable experience.
Above: A soaking wet branching tawny owlet I photographed as it temporarily perched on a beech tree branch after a torrential downpour.
In ancient woodlands, it’s often difficult to isolate owlets from surrounding environmental elements such as rogue branches, leaves and other distractions. I work to eliminate as many distractions as possible without moving any closer to their roosts. Often all this means is crouching down or shifting ever so slightly to the left or the right. I’m rarely looking to perfect my composition, more to ensure the important features of the owlets are visible.
I’m a big fan of environmental wildlife photography, showcasing my subjects in their natural environment. Close-up, detailed portraits have their place, but it’s hard to beat the storytelling power of capturing the magic of owlets interacting with their surroundings. I achieve this by shooting slightly wider than I think I’ll need; I always have the ability to crop in post if I want to get a touch tighter to my subject.
Camera Settings for Photographing Branching Tawny Owlets
I like to keep my settings straightforward. I always shoot in manual mode, with a minimum shutter speed between 1/100th and 1/200th of a second. This is still very much on the slow side, but for non-moving perched owlets, I have a decent success rate, especially with a little help from image stabilisation. My ISO is set to auto, and typically ranges between 3200 and 6400, depending on the time of day and how shaded the woodland is. I keep my aperture wide open to gather as much light as possible.
- ISO: Auto
- Aperture: Wide-open
- Shutter speed: variable, but minimum of 1/200th for static owlets
- Focal length: 400mm absolute minimum to avoid disturbance
- Exposure compensation: Varies, but generally +1 EV shooting dark owls against brighter backgrounds
- Image stabilisation: On (IS & IBIS)
- Autofocus mode: Spot
- Drive mode: Single shot
- White balance: Auto
Because I’m working with slower shutter speeds than I’d normally use in good light, I rely heavily on a proper bracing technique to minimise camera shake. A solid stance, a supported grip with tucked elbows, and controlled breathing make a noticeable difference to my success rate. I rarely use a tripod these days, especially with the impressive noise handling of my Canon R5, but a tripod can be invaluable for fine-tuning focus and low-pressure photography.
Key Takeaways for Photographing Tawny Owlets
First and foremost, prioritise ethics. Approach all wildlife photography with care and respect; it’s our job to lead by example and inspire future generations.
Get out and explore your local woodlands through late autumn and winter. It’s much easier (though still difficult) to find adult tawny owls under bare canopies. Map locations that feel promising and listen out for their iconic calls throughout the night. Tawny owls pair for life, and they’re highly territorial; if you hear activity in a specific woodland, odds are they won’t be far. This will put you in a strong position come breeding season.
Understand the unique behaviour of tawny owlets, from their distinctive calls to their branching phase. Never approach too closely, and if you feel your presence is causing distress, step back further and give them the space they need.
Photography under the low light of summer woodland canopies can be challenging. But with a little persistence and good technique, you’ll be able to capture sharp images in even the most demanding conditions. Don’t worry so much about filling a frame with ultra-close-ups; capture their vulnerability and resilience through creative environmental compositions.
Further Reading
Many of the fieldcraft techniques I’ve mentioned in this post, I cover in much greater detail in my in-depth guide to ethical barn owl photography. In my opinion, fieldcraft is one of the greatest skills you can develop as a wildlife photographer. It allows you to connect with your subject and begin to notice patterns and signs of activity that the untrained eye would easily miss.
Fieldcraft also allows you to blend in with your environment, letting wildlife come to you without ever disturbing them. I’ve said it time and time again: it’s a skill that costs nothing other than time, yet delivers far greater benefits than any gear upgrade ever could.